Sunday, December 4, 2016

Aunt Barb's Christmas Stocking

Aunt Barb loved to crochet, and she was quick to crochet each new baby a Christmas stocking for their first Christmas.  Made in the traditional granny square they each became a treasured heirloom.  When cancer took her home to heaven the tradition has continued and each new baby gets a stocking from Grandma.  Here is her basic pattern, we have used many color combinations but the favorite are the classic red, green and white.  Enjoy!


For this you will need 3 colors of yarn, I am using red, green, and white Red Heart Yarn which was her favorite to use for the project. 
Size J crochet hook
yarn needle

To start your first granny square  with red yarn chain 3 and make a loop,
Round 1: ch 2, make 2 DC in the loop, (ch 1, do 3 DC in the loop), repeat 2 times, ch 1 slip st to the top of the ch 2, tie off.  You will need 15 of these, I find it faster to just work with one color and do all the squares at once.    

Round 2: with green working in the corner ch 1 space, ch 2, 2 DC, ch 1 3 DC in the first corner, ch 1 move to the next corner and do 3 DC, ch 1 3 DC, repeat in the next two corners, ch 1 sl st in the top of the first ch 2, tie off.  

Round 3:  with white and starting in the corner ch 2 2DC, ch 1 3DC, ch 1 3DC in the center ch 1 space, then the next corner 3 DC, ch 1 3DC, ch 1 3DC, ch 1 repeat ending with a ch 1 sl st to the top of the ch 2.  For this round I leave a long string to use to sew the squares together as I go.  

For the heel of the stocking make 1:

Round 1: chain 3 in red and make a loop.  Ch 2, make 2 DC in the loop, ch 1, 3 DC, repeat once, ch 1 sl st to the top of the ch 2.  
Round 2:  in green, ch 2, 2DC, ch 1, 3 DC, ch 1 then 3 DC, ch 1, 3DC  ch 1 repeat in the next corner, ch1 and sl st to the top of the ch 2.  Tie off and switch to white.  

Round 3: working in white, ch 2, 2 DC in the first corner, ch 1 3 DC in the same space, ch 1 3DC in the next ch 1 space, ch 1 3 DC ch 1 DC in the next corner, repeat around, ch 1 sl st to the top of the first ch 2.  tie off leaving a long string.  

Sew pieces together starting at the toe then do 2 rows of double crochet around the top of the stocking starting at the back of the sock, make a chain 20 from the end of your second row to make a loop for hanging the stocking, then do 2 rows of SC on the chain to make it sturdy.

Monday, January 12, 2015

Baby Bear Hat

I have two new grandsons this month and one foster granddaughter, so of course they needed a new hat.  This hat I first made in Martha Stewart extra soft wool blend, and loved how it was so soft and warm, then I made it in Lion Brand Heartland yarn, and loved that as well.  Pictured will be the Heartland yarn hat.

For this you will need the following:
Lion Brand Heartland Yarn in:
126 Sequoia
169 Shenandoah
Size I or 5.5 mm hook
yarn needle
2 black buttons

Starting with the Sequoia make a magic loop or a ch 4 loop and ch 1.
Round 1:  do 10 HDC in the loop and pull tight, sl st to the top of the first st and ch 1.
Round 2:  do 2 HDC in each st around, sl st to the top of the first st and ch 1. (20 HDC)
Round 3:  do 2 HDC in the first st, 1 HDC in the next st, repeat around, sl st to the top of the first st and ch 1.  (30 HDC)
Round 4:  do 2 HDC in the first st, 1 HDC in the next 2 sts, repeat around, sl st to the top of the first st and ch 1.  (40 HDC)
Round 5:  do 2 HDC in the first st, 1 HDC in the next 4 sts, repeat around, sl st to the top of the first st and ch 1.  (48 HDC)
Rounds 6- 12:  1 HDC in each st around, sl st to the top of the first st and ch 1.  (48 HDC)
At the end of round 12 begin the first ear flap.


Ear Flap:
Row 1:  1 SC in the next 8 sts, ch 1 and turn.
Row 2:  SCD in the first 2 sts, 1 SC in the next 4 sts, SCD in the last 2 sts, ch 1 turn.
Row 3:  1 SC in the next 6 sts, ch 1 turn.
Row 4:  SCD in the first 2 sts, 1 SC in the next 2 sts, SCD in th last 2 sts, ch 1 turn.
Row 5:  1 SC in the next 4 sts, ch 1 turn.
Row 6:  SCD in the first 2 sts, SCD in the next 2 sts, ch 1 turn.
Row 7:  SCD in the last 2 sts, tie off.
Count 18 sts across the front of the hat and start ear flap 2.

After you finish the second ear flap starting at the tip of either ear flap with Shenandoah SC evenly around the base of the hat.

Ears are made in 4 parts, 1 inside ear and 1 outside ear stitched together, this makes the ear a little more sturdy.  I crocheted the front to the back to save time just matching sts from the front to the back and HDC the two together.

Inside Ear, make 2
Round 1:  starting with a magic loop, ch 1 and make 12 HDC in magic loop, sl st to the top of the first st, ch 1
Round 2:  2 HDC in the next 10 sts. (20 HDC) tie off.

Repeat instructions above for the outside ear but do not tie off after round two, ch 1 then start
Round 3:  with the inside ear on top, do 1 HDC in each st, through both sts on the inside and outside ear around, tie off leaving a long tail to sew on the ear.

Nose:  starting with Sequoia and a magic ring, ch 1.
Round 1:  make 10 SC in the ring, sl st to the top of the first st and tie off leaving enough tail to make a mouth with your yarn needle and a double thread.
Round 2:  switch to Shenandoah, ch 1 and do 2 HDC in the first st, 1 HDC in the next st, repeat around and sl st to the top of the first st and ch 1. (15 HDC)
Round 3:  Do 2 HDC in the first st, 1 HDC in the next 2 sts, repeat around, tie off leaving a long tail to sew on the nose.  I used a little bit of polyfill stuffing to make the nose stick out just a little.

Braids:
For each braid cut 6 strands of Sequoia and 6 strands of Shenandoah.  Make each strand about 30 inches long.

Thursday, March 13, 2014

Rose Beanie Crochet Hat

I had a request for the Rose Beanie in Adult size so here it is.  My husband and daughter are on a dental mission trip this week in Guyana so I have had a little time to catch up on things and finish up a few projects.  This hat was made with Cascade Yarns 220 Superwash Wool, but any worsted weight yarn will work.

For this you will need the following:
Cascade Yarns 220 Super Wash wool in color number 862 (brown)
Size J or 6mm hook
yarn needle
Size L or 8mm hook
CL = Cluster stitch
Beg CL = Beginning Cluster stitch

To start make a magic loop with your J hook, or chain 4 loop and chain 1.
Round 1:  make 12 HDC in the loop, sl st to the top of the first stitch.
Round 2:  ch 1, do *2 HDC in each stitch around, sl st to the top of the first st.  (24 HDC)
Round 3:  ch 1, do *2 HDC in the first st, 1 HDC in the next st, repeat around, sl st to the top of the first st. (36 HDC)
Round 4:  ch 1, do *2 HDC in the first st, 1 HDC in the next 2 sts, repeat around, sl st to the top of the first st. (48 HDC)
Round 5:  ch 1, do *2 HDC in the first st, 1 HDC in the next 5 sts, repeat around, sl st to the top of the first st.  (56 HDC)
Round 6:  ch 1, do *2 HDC in the first st, 1 HDC in the next 7 sts, repeat around, sl st to the top of the first st.  (64 HDC)
Rounds 7-16:  ch 2, make the Beg CL in the same st, ch 1, *sk the next st, CL in the next st ch 1, repeat from * (32 Clusters) sl st to the top of the first CL and sl st to the ch 1 space.  Clusters in rows 8-16 will be worked in the ch 1 space between the clusters of the previous row.

The beginning cluster (beg cl) stitch is made by ch 2, yo, insert hook in the designated st, yo, pull loop through, yo, pull through 2 loops on hook, yo, insert hook in same st, yo, pull loop through, yo, pull through 2 loops on hook, yo, pull through all 3 loops on hook.

Cluster Stitches (cl) are Yo, insert hook in designated st, yo, pull lp through, yo, pull through 2 loops on hook, [yo, insert hook in same st, yo, pull loop through, yo, pull through 2 loops on hook]twice, yo, pull through all 4 loops on hook. 

Rounds 17-20:  ch 1, SC in each st around (64 SC) sl st to the top of the first st. 
After round 20 tie off and weave in all ends.  


Flower:  with your L hook, chain 4 and make a loop.
Round 1:  ch 1 and SC in the loop, ch 3, SC in the loop, ch 3 SC in the loop, ch 3 and sl st to the first SC. 
Round 2:  sl st in the first ch 3 space then do *1HDC, 3DC, 1HDC, Slip stitch in each chain 3 loop.  
Round 3:  you will be working on the backside for this round and making the foundation for the next round of petals.  SC around the post of the first petal and ch 3,  SC between the 2 & 3 DC in the first petal from round 2, ch 3, SC between the HDC and 1st DC in the next petal, ch 3, SC between the HDC and sl st on the same petal, ch 3, SC between the 2 & 3 DC in the last petal, ch 3 and sl st in the SC on the post.  
Round 4:  in each ch 3 space do, 1 sl st, 1 HDC, 4DC, 1 HDC, 1 sl st.  For a total of 5 petals.
Round 5: working on the backside again for the next foundation, SC around the post of the first petal, ch 3, SC between the 4th DC and the HDC in the first petal, ch 3 and SC between the 3rd &4th DC in the second petal, ch 3 and SC between the 2nd & 3rd DC in the third petal, ch 3 and SC between the 1st & 2nd DC in the fourth petal, ch 3 and SC between the first HDC and DC in the fifth petal ch 3 and sl st to the first SC in the post.
Round 6:  for each ch 3 space do 1 sl st, 1 HDC, 5 DC, 1 HDC, 1 sl st.   Tie off after you finish the 6th petal leaving a long tail to sew on the flower.  


Monday, March 10, 2014

Newborn Rose Beanie

This little cutie is my great niece who was born a few weeks early.  We said a lot of prayers for her and her mommy who had to spend several weeks in the hospital before baby was born.  We are thankful that she did not have to spend any time in the NICU and was able to go home after just two days!!  

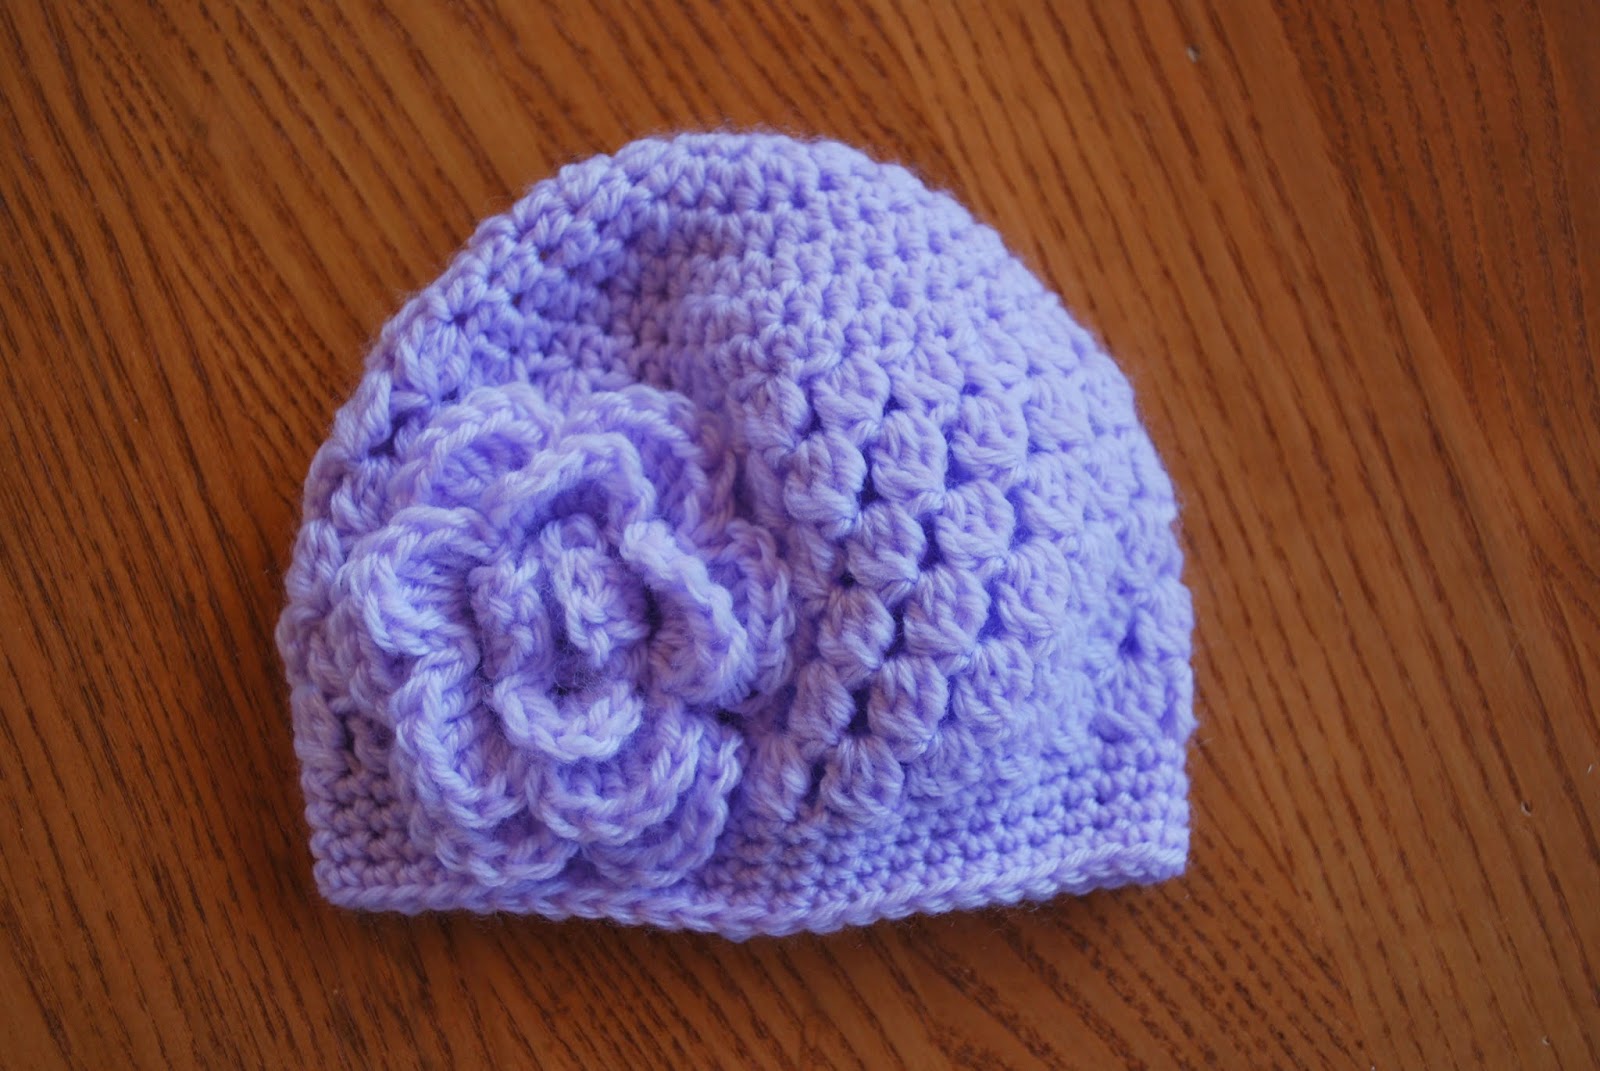
This is basically the same pattern as the Flower Hat but using DK yarn and a smaller hook.  I wanted to make a few up ahead as with many nieces and nephews now married and starting their families I need a stash of hats for the new little ones.  For this you will need the following:

DK Yarn in the color of your choice, I used Cascade Cherub DK in Lavendar color 16.  
Hook size for the hat was H or 5mm.
Flower Hook size J.
Yarn needle to weave in ends and sew on flower.
For a Preemie hat use a G hook.  


 Start with a magic loop or a chain 4 loop which ever you prefer.
Round 1:  Ch 1 and make 10 HDC, sl st to the top of the first HDC.
Round 2:  Ch 1 and do 2 HDC in each st around, sl st to the top of the first HDC.  (20 HDC)
Round 3:  Ch 1 and do *2 HDC in the first st and 1 HDC in the next st, repeat around, sl st to the top of the first HDC.  (30 HDC)
Round 4:  Ch 1 and do *2 HDC in the first st and 1 HDC in the next 4 stitches, repeat around, sl st to the top of the first HDC.  (36 HDC)
Round 5:  Ch 1 and do *2 HDC in the first st and 1 HDC in the next 5 stitches, repeat around, sl st to the top of the first HDC, join to the top of the first HDC.  (42 HDC)
Round 6:  Ch 1 and do *2 HDC in the first st and 1 HDC in the next 6 stitches, repeat around, sl st to the top of the first HDC.  (48 HDC)
Round 7 is worked in cluster stitches.  Ch 2 and make beg cl in the first st, (see below for instructions on cluster stitches) *ch 1, sk the next stitch and begin cl in the next st. Repeat from * around, sl st to the top of the first cl.  (24 CL) 

The beginning cluster (beg cl) stitch is made by ch 2, yo, insert hook in the designated st, yo, pull loop through, yo, pull through 2 loops on hook, yo, insert hook in same st, yo, pull loop through, yo, pull through 2 loops on hook, yo, pull through all 3 loops on hook.

Cluster Stitches (cl) are Yo, insert hook in designated st, yo, pull lp through, yo, pull through 2 loops on hook, [yo, insert hook in same st, yo, pull loop through, yo, pull through 2 loops on hook]twice, yo, pull through all 4 loops on hook. 

Rounds 8-12:  sl st to the first ch 1 space and make beg cl (instructions above), *ch 1 make next cl in the next ch 1 space, repeat around, ch 1 sl st at the top of the first cl. (24 cl)

Rounds 13-16:  ch 1 and SC in each st around, sl to to the top of the first SC.  (48 SC) At the end of round 16 tie off and weave in end.  

Flower:  chain 4 and make a loop.
Round 1:  ch 1 and SC in the loop, ch 3, SC in the loop, ch 3 SC in the loop, ch 3 and sl st to the first SC. 
Round 2:  sl st in the first ch 3 space then do *1HDC, 3DC, 1HDC, Slip stitch in each chain 3 loop.  
Round 3:  you will be working on the backside for this round and making the foundation for the next round of petals.  SC around the post of the first petal and ch 3,  SC between the 2 & 3 DC in the first petal from round 2, ch 3, SC between the HDC and 1st DC in the next petal, ch 3, SC between the HDC and sl st on the same petal, ch 3, SC between the 2 & 3 DC in the last petal, ch 3 and sl st in the SC on the post.  
Round 4:  in each ch 3 space do, 1 sl st, 1 HDC, 4DC, 1 HDC, 1 sl st.  For a total of 5 petals.
Round 5: working on the backside again for the next foundation, SC around the post of the first petal, ch 3, SC between the 4th DC and the HDC in the first petal, ch 3 and SC between the 3rd &4th DC in the second petal, ch 3 and SC between the 2nd & 3rd DC in the third petal, ch 3 and SC between the 1st & 2nd DC in the fourth petal, ch 3 and SC between the first HDC and DC in the fifth petal ch 3 and sl st to the first SC in the post.
Round 6:  for each ch 3 space do 1 sl st, 1 HDC, 5 DC, 1 HDC, 1 sl st.   Tie off after you finish the 6th petal leaving a long tail to sew on the flower.  

Tuesday, March 4, 2014

Baby Tulip Sun Hat

This is an all cotton hat that will be cute for spring or summer, and help keep the sun out of baby's eyes.  I had some time this last week to slow down, not really by choice, my appendix decided that it was going to act up, so it had to come out.  I looked at lots of patterns and got lots of ideas, and after trying a tulip border for a dish cloth decided I wanted to do one into a hat.  For this hat I learned a new stitch, the ball stitch, and then made a Y stitch that I will explain in the pattern, it is not hard and worked great for the leaves.

For this I used Bernat Cottontots yarn in the following colors:
Sweet Cream
Poppy
Catnip
This was stash yarn, so no longer available, however, Lion Brand Cotton Ease, or Lion Brand Natures choice would also work nicely.  You could also use Cascade Yarns Luna, or Avalon.  

You will need a size I or 5.5mm hook, and a yarn needle.
Size 6-12 months
Using cream make a magic loop or a make a ch 4 loop then ch 1.
Round 1:  do 10 HDC in the loop, draw it tight and sl st to the top of the first st.  
Round 2:  ch 1, do 2 HDC in each stitch around, sl st to the top of the first st.  (20 HDC)
Round 3:  ch 1, do *2 HDC in the first st, 1 HDC in the next, repeat around, sl st to the top of the first st.  (30 HDC).  
Round 4:  ch 1, do *2 HDC in the first st, 1 HDC in the next 5 sts, repeat around, sl st to the top of the first st.  (35 HDC)
Round 5:  ch 1, do *2 HDC in the first st, 1 HDC in the next 6 sts, repeat around, sl st to the top of the first st.  (40 HDC)
Round 6:  ch 1, do *2 HDC in the first st, 1 HDC in the next 7 sts, repeat around, sl st to the top of the first st.  (45 HDC)
Round 7:  ch 1, do *2 HDC in the first st, 1 HDC in the next 8 sts, repeat around, sl st to the top of the first st.  (50 HDC)
Rounds 8-10:  ch 1, do 1 HDC in each st around, sl st to the top of the first st.  (50 HDC)  Tie off after round 10 and switch to Poppy.  

The Ball Stitch is made by doing 4 HDC together.  The stitch is *YO (yarn over), insert hook into designated stitch, YO and draw through st, repeat this 3 more times, YO and draw through all 9 loops leaving one remaining.  
The Beginning Ball Stitch is made by doing a ch 1, YO, insert hook into same st, YO and draw through st,  repeat 2 more times, YO and draw through all 7 loops.  If you start with the ch 1 then a regular ball stitch your first ball stitch would be slightly bigger.  

Round 11:
You will be working the ball stitch in every other stitch around (25 balls).  To start with your beginning ball stitch, ch 1 (this will count as the first YO and draw through), then YO insert the hook in the same st as the ch, draw through, repeat 2 more times, YO and draw through all 7 loops, *(ch 2, sk the next st, and start the next regular ball stitch YO, insert hook into st, YO and draw through st, repeat this 3 more times, YO and draw through all 9 loop leaving one remaining).  Repeat from * around making a ball stitch in every other stitch, and sl st to the top of the first ball st and tie off.  Switch to Catnip.

Round 12:  this is a stitch I am going to call a Y stitch, you begin on one side of the ball, switch to the other side then finish the post of the stitch.  To start attach your catnip or green yarn next to any ball stitch, ch 2, YO insert hook in the ch 2 space on the other side of the ball stitch pull up a loop, YO pull through 2 loops, YO pull through last 2 loops, ch 2, then start the next Y stitch around the next ball stitch in the same ch 2 space from the previous row, *(YO insert hook and pull up a loop, YO pull through 2 loops, YO insert hook on the opposite side of the ball stitch pull up a loop, YO and pull through 2 loops, YO pull through the last 3 loops, ch 2).   repeat from * around to make the tulip stem around each ball stitch.  Slip stitch to the bottom of the first flower post and tie off.

Round 13:  switch back to cream ch 1 and do 2 HDC in each ch 2 space from the previous row, sl st to the top of the first st. (50 HDC)
Round 14:  ch 1, 1 HDC in each st around, sl st to the top of the first st. (50 HDC).
Round 15:  ch 1, 2 HDC in the first st, 1 HDC in the next, repeat around, sl st to the top of the first st. (75 sts).
Round 16:  ch 1, 2 HDC in the first st, 1 HDC in the next 4 sts, repeat around, sl st to the top of the first st. (90 HDC).
Round 17:  1 SC in each st around, sl st to the top of the first st, tie off and weave in all ends.  (90 SC)

Size 0-3 months

begin with your magic loop, ch 1.
Round 1:  make 10 HDC in the loop, sl st to the top of the first st.
Round 2:  ch 1, 2 HDC in each st around, sl st to the top of the first st. (20 HDC)
Round 3:  ch 1, 2 HDC in the first st, 1 HDC in the next st, repeat around, sl st to the top of the first st. (30 HDC).
Round 4:  ch 1, 2 HDC in the first st, 1 HDC in the next 5 sts, repeat around, sl st to the top of the first st. (35 HDC).
Round 5:  ch 1, 2 HDC in the first st, 1 HDC in the next 6 sts, repeat around, sl st to the top of the first st. (40 HDC).
Round 6:  ch 1, 2 HDC in the first st, 1 HDC in the next 9 sts, repeat around, sl st to the top of the first st. (44 HDC).
Rounds 7-8:  ch 1, 1 HDC in each st around, sl st to the top of the first ch, tie off after round 8 and switch to Poppy.
Round 9:  make a ball stitch in every other stitch around ch 2 between each ball (see above instructions). (22 ball stitches)
Round 10:  Follow instructions above in round 12 and make a Y stitch around each ball stitch, tie off and switch back to cream.
Round 11:  ch 1 and do 2 HDC in each ch 2 space from the previous row.  (44 HDC).
Round 12:  ch 1, do 2 HDC in the first st, and 1 HDC in the next repeat around, sl st to the top of the first st. (66 HDC).
Round 13:  ch 1, do 2 HDC in the first st, and 1 HDC in the next 5 sts, repeat around, sl st to the top of the first st.  (77 HDC).

Round 14: do 1 SC in each st around, sl st to the top of the first stitch, tie off and weave in all loose ends.  

Friday, February 21, 2014

Victoria Beanie

I've been really bored sitting on the couch, rehabbing from a badly sprained ankle. When the doctor told me that I should be off it for 7 to 10 days, I had to come up with something to do. So, with the design assistance of one of my favorite teenage "daughters", here is what I spent 2 of my 10 days doing...
The Victoria Slouchy Beanie - designed, in part by Vicki

Supplies:
Yarn - Bernat Softee Baby in Soft Red (it was all I had within reach!)
Size 7 Circular Needles, 16" (and double points in size 7 if desired)
Cable Needle
Stitch Marker
Embroidery or Yarn Needle

Pattern:
Cast on 118 stitches and work 1" in a K1, P1 rib.
After band is formed, begin working the following pattern refering to Chart 1 (cable) and Chart 2 (leaves). 

Row 1: Knit Chart 1 (cable), Knit Chart 2 (leaves) - for this row only K2Tog on the first stitch of Chart 2 (leaves). Repeat Charts 1 and 2 twice more (3 repeats of each chart total)

Since the charts cover different numbers of rows, it is important to keep track of each section independently. Work the charts in pattern until the hat reaches approximately 9" - you will have completed the leaves chart 5 times.

Chart 1 - Cable Pattern

Chart 2 - Leaves Pattern
 Begin Decrease using the following pattern:
Decrease Row 1 - continue to work the cable chart as previous. In each section where the leaves chart is worked K2, K2tog, K7, SSK, P, K2tog, K7, SSK, K2.
Decrease Row 2 - while working cable chart; in leaves section, K2, K2tog, K5, SSK, P, K2Tog, K5, SSK, K2.
Decrease Row 3 - while working cable chart; in leaves section, K2, K2Tog, K3, SSK, P, K2Tog, K3, SSK, K2.
Decrease Row 4 - while working cable chart; in leaves section, K2, K2Tog, K, SSK, P, K2Tog, K, SSK, K2.
Decrease Row 5 - while working cable chart; in leaves section K2, K3Tog, P, K3Tog, K2.
Decrease Row 6 - while working cable chart; in leaves section K3Tog, P, K3Tog.
Decrease Row 7 - while working cable chart; in leaves section K3tog.
Decrease Row 8 - starting in cable section P2Tog, P, work knit stitches as in cable chart, P, P2Tog, K (the stitch left from leaves section). Repeat this twice more, but stop row one stitch short
Decrease Row 9 - with last stitch from previous row P3tog, work knit stitches as in cable chart, P3tog. Repeat twice more.
Decrease Row 10 - P, K2Tog, K2, K2Tog. Repeat twice more.
Decrease Row 11 - K2Tog. Repeat until last stitch. Sew through stitches and bind off to create top of the hat.


Monday, February 17, 2014

Bitty Baby Wave Blanket

I have three granddaughters who have Bitty Babies and they are some of their favorite playmates, when they come here to visit they like to find Auntie Emily's Bitty Twins and play with them wrapping them in an old knitted wave afghan that was made for my girls.  I thought it was time to use up some of the stash yarn and make something they could play with at home that would be just the right size.

For this you will need some worsted weight yarn.  I used Caron Simply Soft in bright colors, and for the second baby blues with
Bernat Softee Baby yarn.
Size I or 5.5 mm hook
yarn needle to weave in ends

The wave pattern in made in multiples of 13 for the base chain, I used 91.  So for this size chain 91.

ROW 1:  Starting in the third chain from the hook DC in the next 4 sts, *(3 DC in the next st, then 1 DC in the next 5 sts., sk the next 2 ch sts., then 1 DC in the next 5 sts), repeat from * across.   At the end ch 3 and turn.
ROW 2:  Sk the first st, then 1 DC in the next 4 sts, *(3 DC in the next st, then 1 DC in the next 5 sts, sk the next 2 sts., then 1 DC in the next 5 sts), repeat from * across.  At the end of the row chain 3 and turn.

Repeat Row 2 until you have completed 36 rows.  

I did 4 rows of each color to make a striped afghan, but you can make your blanket in any color combination that you like.  This is a great way to use up old yarn!!

Tuesday, February 11, 2014

Kelly the Giraffe crochet hat

I am making this hat for a new baby boy coming to our family this spring a great nephew, and decided to name it Kelly after one of our daughter's friends who LOVES giraffes.  This is a basic hat pattern with some added parts, and will see if I can also work up a moose and horse using the same base pattern.

For this I used Hometown USA yarn in Daytona Lemon
Los Angeles Tan
Billings Chocolate brown.
Size J or 6mm hook
yarn needle
buttons for nostrils and eyes

Size 0-3 months
For the bulky yarn it works best to make a magic ring then ch 2.
Round 1:  make 10 DC in the ring, sl st to the top of the first st and ch 2.
Round 2:  2 DC in each st around, sl sst to the top of the first st, ch 2. (20 DC)
Round 3:  2 DC in the first st, 1 DC in the next, repeat around, sl st to the top of the first st, ch 2 (30 DC)
Round 4:  2 DC in the first st, 1 DC in the next 4 sts, repeat around, sl st to the top of the first st, ch 2 (36 DC)
Rounds 5-8: 1 DC in each st around, sl st to the top of the first st, ch 2 (36 DC).
begin the first ear flap after round 8, ch 1.

Ear flaps.
Row 1:  1 SC in the next 6 sts, ch 1 turn.
Row 2:  SCD in the first 2 sts, 1 SC in the next 2 sts, SCD in the last 2 sts, ch 1 turn.
Row 3:  1 SC in each of the 4 sts across, ch 1 turn.
Row 4:  make 2 SCD sts across, ch 1 turn.
Row 5:  SCD and tie off.
count across 12 sts across the front of the hat and begin the 2nd ear flap.

Starting at the tip of either ear flap with Chocolate Brown, SC evenly around the base of the hat, when you get to the tip of the next ear flap ch 35 then work back up the chain, *sk the first 2 ch sts, then sl st in each st back up to the tip of the ear.  When you get back to the tip of the other ear flap ch 35 and repeat from the *, tie off and weave in end.

Ears.  make a magic loop with the Lemon color and ch 2.
Round 1:  make 10 DC in the loop, pull tight and sl st to the top of the first st, ch 1
Round 2:  1 SC in the first st, 2 HDC in the next st, 1 DC in the 3rd st, 1 DC 1 TC 1 DC in the 4th st, 1 DC in the 5th st, 2 HDC in the 6th st, 1 SC in the last 4 sts, sl st to the top of the first st, leave a long tail to sew on the ear.

Horns.  Starting with Chocolate brown, make a magic loop and ch 2.
Round 1:  make 8 DC in the loop, pull tight and sl st to the top of the first st, ch 2.
Round 2:  1 DC in each st around, sl st to the top of the first st, tie off and switch to Lemon.
Round 3:  DCD in the first 2 sts, 1 DC in the next 4 sts, DCD in the last 2 sts, sl st to the top of the first st.
Round 4:  1 DC in each st around, sl st to the top of the first st. (6 DC).  After round 4 leave a long tail to sew on the ear.

Nose:  Using Tan chain 9,
Row 1:  sk the first st, make 1 SC in the next 8 sts, ch 1 turn.
Rows 2-3: 1 SC in each st across, ch 1 turn.
Row 4: SCD in the first 2 sts, 1 SC in the next 4 sts, SCD in the last two sts,
Row 5: 1 SC in each st across, ch 1 turn. (6 SC)
Row 6:  SCD in the first 2 sts, 1 SC in the next 2 sts, SCD in the last 2 sts, at the end of this row SC evenly around the outside of the nose and sl st to the top of the first st, tie off and leave a long tail to sew on the nose.

Sew on buttons.

Sunday, February 2, 2014

Savory Crescent Chicken Squares

This recipe came from a dear friend who had us over for dinner one night, these were amazing and simple.  You can also use turkey too, so this is a great recipe for leftovers from Thanksgiving.  You can also make the chicken mixture up ahead and refrigerate it, then just heat it a little before you put it in the crescent rolls so it will cut down on baking time.

4 oz Cream cheese (can use 1/3 less fat cream cheese)
5 TBS butter or margarine
4 Cups cooked cubed chicken breast (about 2 lbs boneless, skinless)
1/4 cup milk
1/2 tsp. salt
1/4 tsp. pepper
2 TBS chopped onion (or dry minced) or if you have picky eaters use onion powder.
2 cans crescent rolls (can use reduced fat rolls)

Sauce:  1 can mushroom soup mixed with 2/3 cup milk and warmed.  Or chicken gravy heated.

Melt margarine in fry pan - add chicken and onions (minced or powdered), stir in cream cheese, milk, salt and pepper.  Mix well.  Let cool a little.  Separate rolls into 8 rectangles and firmly press perforations to seal.  (Makes 4 squares), repeat with the second can of rolls.  
Spoon 1/2 cup chicken mixture into center of each square.  
Pull 4 corners to the top and seal the edges.  Place on cookie sheet and bake approx. 15 to 20 minutes, or until brown at 375 degrees.  After removing from oven spoon mushroom sauce or chicken gravy over the top.  

Tuesday, January 21, 2014

Jane's Chicken Sweater

It was -14 degrees this morning when we left at 8:30 to take Abby to school. It's just a wee bit warmer in the chicken coop at 14 degrees above zero. Jane had a little problem - no feathers from mating and too cold to get herself warm. So today's project was making Jane a chicken sweater. Here's how we pulled it together.

Materials: 
Pattons Classic Wool (just ends of a skein - we used maybe 1/8th of a skein)
2 large and 1 small button
Size H crochet hook

Note: Jane is a frizzle cochin, so this pattern is fitted for a small bantam breed. This pattern will not fit onto a laying hen without some major modification.

A very naked chicken who really needed a sweater.
Pattern:
Row 1: Chain 40
Row 2: Double Crochet into 38 stitches, Chain 1, Double Crochet into last stitch
Rows 3-10: Double Crochet
After row 10 break wool and weave in ends.

Straps: 
Row 1: Double Crochet into the first five stitches.
Row 2: Turn work and Double Crochet into Row 1
Row 3-10: Double Crochet
Row 11: Chain 6 and join chain to opposite side of strap (making a loop for a large button).

Repeat for a second strap on the last five stitches of the cape.

Button Tab:
In the middle 10 stitches of the cape, Double Crochet for 5 rows. Attach two large buttons to secure the loops.

I also chained a strap 6 stitches long to go around behind Jane's legs. She did not appreciate it, but the sweater stays on better.
It also is very helpful to have a three year old who will "sort" your buttons and play with the chicken in between fittings. Thanks Olivia!


Wednesday, January 1, 2014

Evil Minion Ear Flap Hat

My daughter Melissa has been making crochet minion hats for her kids and friends, when she was home for Thanksgiving she was going through my stash and found a purple that was perfect for an evil minion hat.  She is very good at making hats but not fond of writing out patterns, so I am doing this one just for her.  You can use this pattern to make a yellow minion as well.  With the bulky yarn this hat works up very quickly.

For this hat you will need the following:
Size J or 6 mm hook
Size I or 5.5 mm hook
Lion Brand Hometown USA in the following colors:
Minneapolis purple or Denver Rocky Mountain Violet
Oakland Black
Lion Brand Homespun Yarn in Purple Haze
Lion Brand Vanna's choice in:
silver grey
white
chocolate

This pattern can also be used to make a regular minion by using the following colors:
Lion Brand Hometown USA:

Pittsburgh Yellow
Oakland Black
Fort Worth Blue
Lion Brand Vanna's choice in:
Silver grey
white
chocolate

For a preschool age size:
using your J hook, make a magic loop with Minneapolis purple.
Round 1:  10 DC in the loop, sl st to the top of the first st, ch 2.
Round 2:  2 DC in each st around, sl st to the top of the first st, ch 2. (20 DC)
Round 3:  2 DC in the first st, 1 DC in the next st, repeat around, sl st to the top of the first st, ch 2. (30 DC)
Round 4:  2 DC in the first st, 1 DC in the next 2 sts, repeat around, sl st to the top of the first st, ch 2. (40 DC)
Round 5:  2 DC in the first st, 1 DC in the next 3 sts, repeat around, sl st to the top of the first st, ch 2. (50 DC)
Round 6:  1 DC in each st around, sl st to the top of the first stitch, tie off and change to Oakland Black.
Round 7-8:  1 DC in each st around, sl st to the top of the first stitch, ch 2, after round 8 tie off and switch back to Minneapolis purple.
Rounds 9-12: 1 DC in each st around, sl st to the top of the first stitch, ch 2, after round 12 ch 1 and begin the first ear flap.

Ear flap 1:
Row 1: 1 SC in the next 10 sts., ch 1 and turn.
Row 2:  SCD in the first 2 stitches, 1 SC in the next 6 sts, SCD in the last two stitches, ch 1 and turn.
Row 3: 1 SC in each of the 8 stitches across, ch 1 turn.
Row 4:  SCD in the first 2 stitches, 1 SC in the next 4 sts, SCD in the last two stitches, ch 1 turn.
Row 5: 1 SC in each of the 6 stitches across, ch 1 turn.
Row 6:  SCD in the first 2 stitches, 1 SC in the next 2 sts, SCD in the last two stitches, ch 1 turn.
Row 7:  1 SC in each of the 4 stitches across, ch 1 turn.
Row 8:  make two SCD stitches, ch 1 turn.
Row 9: make one SCD and tie off.

for the second ear flap count over 19 stitches across the front and attach your yarn, ch 1 and use the instructions above.

Finishing the bottom of the hat:
Using Oakland Black and starting at the tip of the ear flap, ch 1 and SC evenly around the bottom edge of the hat, sl st to the top of the first stitch and tie off.  Braids can be made in your choice of color combinations of the purple, black, or purple haze, but if you use the thinner yarn (purple haze) just cut an extra strand to make your braids even.   Each braids is made with twelve strands cut at 36 inches each.

One eyed Minion:
using an I or 5.5mm hook, make a magic loop with Black for the pupil, ch 1 and make 10 HDC in the loop, pull it tight and sl st to the top of the first stitch and tie off the black, switch to chocolate brown.
Round 2:  Make 2 DC in each st around, (20 DC), tie off and switch to white.
Round 3:  Make 2 DC in the first st, 1 DC in the next, repeat around, (30 DC).  Tie off and switch to silver grey.
Round 4: 1 SC in each st around, (30 SC), ch 1.
Round 5 is worked on the inside loop only, make 1 HDC in each st around (30 HDC), tie off leaving a long tail to sew on the eye.

To make a two eyed Minion using the I or 5.5 mm hook, make a magic loop with black and ch 1, make 10 SC in the loop and pull it tight, sl st to the top of the first st and tie off, switch to chocolate brown.
Round 2: make 2 HDC in each st around, sl st to the top of the first st, tie off and switch to white. (20 HDC)
Round 3:  Make 2 DC in the first st, 1 DC in the next, repeat around, sl st to the top of the first st, tie off and switch to silver grey.
Round 4: 1 SC in each st around, (30 SC), ch 1.
Round 5:  working in the inside loop only, make 1 HDC in each st around (30 HDC), tie off leaving a long tail to sew on the eye.  Since your tie off string is on the outside loop weave it back down to the base of the eye with your needle and sew the eye on the center front of the hat working in the outside loop of round 4.

Crazy Hair:
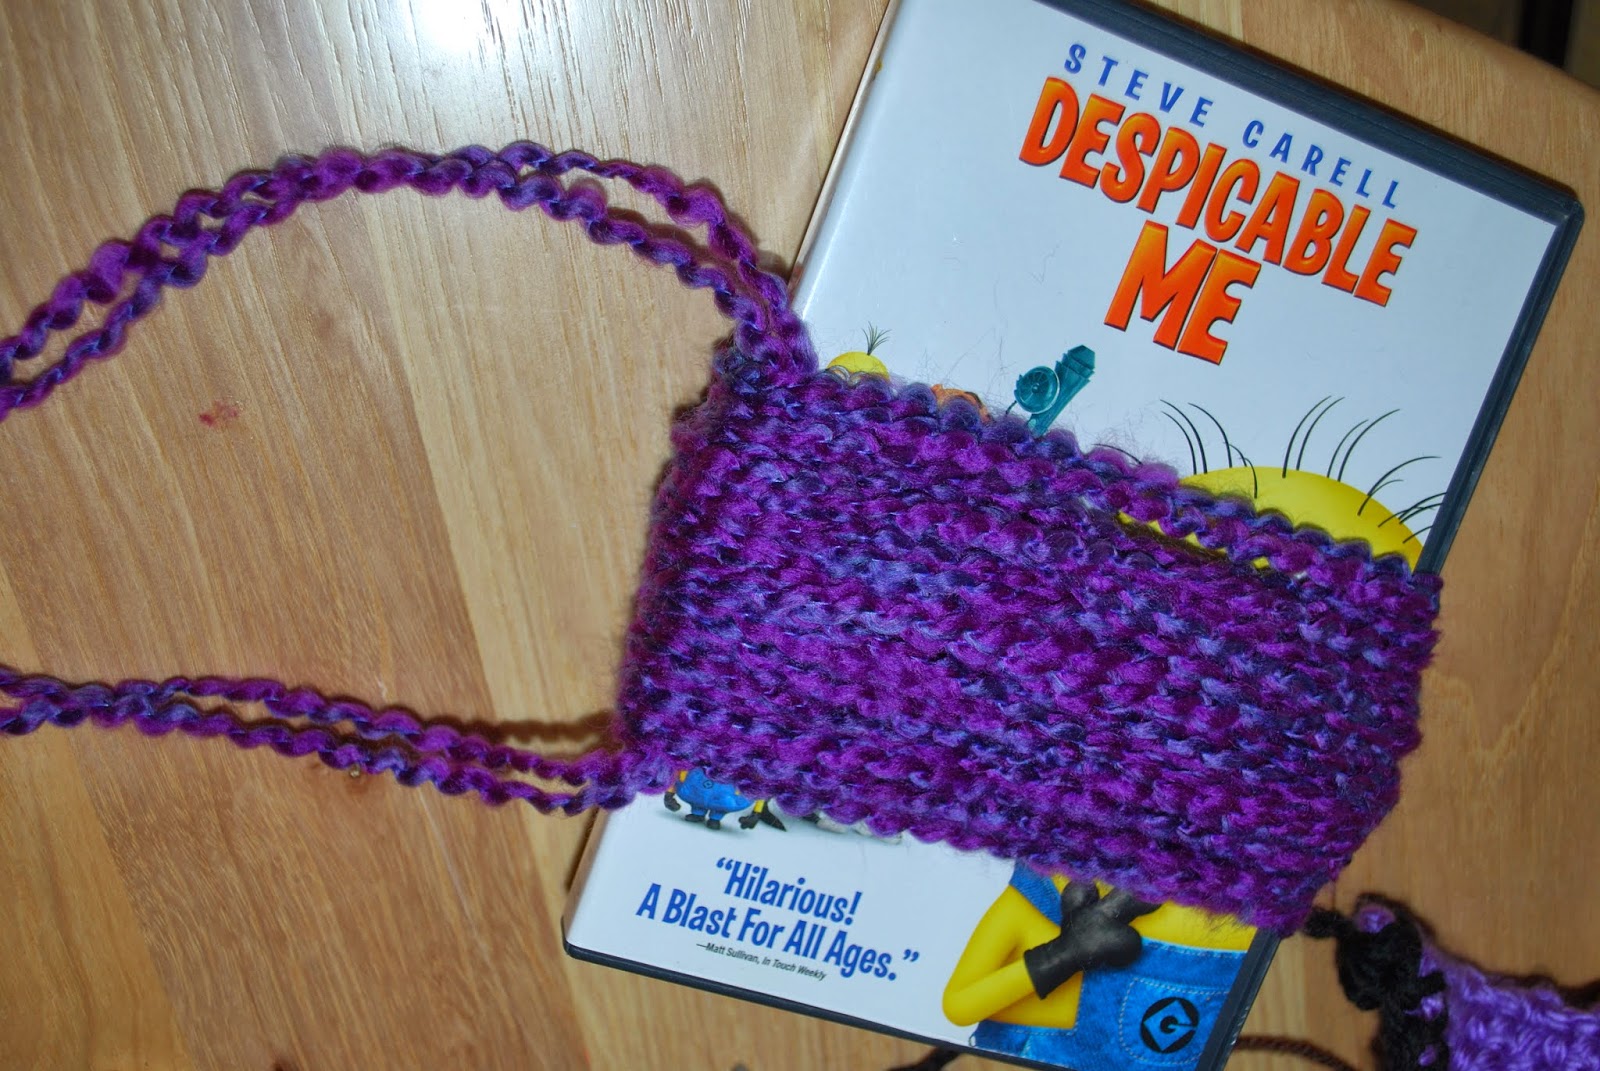
Using the Purple Haze and a dvd case, wrap the case 100 times and tie the yarn opposite the indent to open, (it will make it easier to cut there) tie the bundle with 2 long strands that will be used to tie the hair to the top of the hat then you can pull them up through with your hook, clip them down to match the rest.  Make sure to tie the bundle extra tight.  This yarn tends to fray so it looks better and better as the hat is worn.

Child Size:
Using Minneapolis Purple and a J hook,
Magic ring, chain 2 and make 10 DC in the ring, pull tight and sl st to the top of the first st, ch 2
Round 2:  2 DC in each st around, sl st to the top of the first st, ch 2. (20 DC)
Round 3:  2 DC in the first st, 1 DC in the next, repeat around, sl st to the top of the first st, ch 2 (30 DC).
Round 4:  2 DC in the first st, 1 DC in the next 2 sts, repeat around, sl st to the top of the first st, ch 2 (40 DC).
Round 5:  2 DC in the first st, 1 DC in the next 3 sts, repeat around, sl st to the top of the first st, ch 2 (50 DC).
Round 6:  2 DC in the first st, 1 DC in the next 9 sts, repeat around, sl st to the top of the first st, tie off and switch to Oakland Black and ch 2(55 DC).
Rounds 7-8:  1 DC in each st around, sl st to the top of the first st, ch 2 (55 DC).  After round 8 tie off and switch to Minneapolis purple.
Rounds 9-13:  1 DC in each st around, sl st to the top of the first st, ch 2 (55 DC).  After round 13 start on the first ear flap.

For Child and Adult Ear flaps:
Row 1:  1 SC in the next 12 sts, ch 1 and turn.
Row 2:  SCD in the first 2 sts, 1 SC in the next 8 sts, SCD in the last two sts, ch 1 turn.
Row 3:  1 SC in the next 10 sts, ch 1 turn.
Row 4:  SCD in the first 2 sts, 1 SC in the next 6 sts, SCD in the last two sts, ch 1 turn.
Row 5:  1 SC in the next 8 sts, ch 1 turn.
Row 6:  SCD in the first 2 sts, 1 SC in the next 4 sts, SCD in the last two sts, ch 1 turn.
Row 7: 1 SC in the next 6 sts, ch 1 turn.
Row 8:  SCD in the first 2 sts, 1 SC in the next 2 sts, SCD in the last two sts, ch 1 turn.
Row 9:  1 SC in the next 4 sts, ch 1 turn.
Row 10: make 2 SCD, ch 1 turn.
Row 11: SCD, tie off and weave in the end.  To start the second ear flap count 22 sts across the front for child size and 25 sts across the front of the hat for adult and start the second ear flap using the above instructions.

Size Teen or Adult:
Magic ring, ch 2 and make 10 DC in the ring, pull tight and sl st to the top of the first st, ch 2.
Round 2:  2 DC in each st around, sl st to the top of the first st, ch 2 (20 DC).
Round 3:  2 DC in the first st, 1 DC in the next, repeat around, sl st to the top of the first st, ch 2 (30 DC).
Round 4:  2 DC in the first st, 1 DC in the next 2 sts, repeat around, sl st to the top of the first st, ch 2 (40 DC).
Round 5:  2 DC in the first st, 1 DC in the next 3 sts, repeat around, sl st to the top of the first st, ch 2 (50 DC).
Round 6:  2 DC in the first st, 1 DC in the next 4 sts, repeat around, sl st to the top of the first st, ch 2 (60 DC).   Tie off and switch to Oakland Black.
Rounds 7-8:  1 DC in each st around, sl st to the top of the first st, ch 2 (60 DC).  After round 8 tie off and switch to Minneapolis Purple.
Rounds 9-14: 1 DC in each st around, sl st to the top of the first st, ch 2 (60 DC).  After round 13 start on first ear flap.


Friday, November 29, 2013

Grandma's Log Cabin Hat

In between all the busyness of the holidays and trying to open a medical clinic at the Crisis Pregnancy Center I work at, I found time to sneak this in and it reminds me of growing up in the big log cabin.

Materials:
Paton's Classic Wool worsted weight in Natural Mix
Size 7 circular needles

Pattern:
 Cast on 90 stitches, join and place marker. Work 7 rows in Knit 3, Purl 3 rib.

Lace Pattern:
Row 1: *K 1, YO, K2tog, SSK, YO;* Repeat
Row 2: Knit
Row 3: *K 1, YO, K2tog, SSK, YO;* Repeat
Row 4: Knit
Row 5: *K 1, YO, K2tog, SSK, YO;* Repeat
Row 5: Knit
Row 7: *K 1, YO, K2tog, K5, SSK, YO;* Repeat
Row 8: Knit
Row 9: *K 2, YO, K2tog, K3, SSK, K1;* Repeat
Row 10: Knit
Row 11: *K 3, YO K2tog, K, SSK, K2;* Repeat
Row 12: Knit
Row 13: *K 4, YO, K3tog, YO, K3;* Repeat
Row 14: Knit

Repeat Rows 1-14 three times.

Begin decrease as follows:
Row 1: *K2, K2tog, YO, K3tog, YO, SSK, K*; repeat
Row 2: Knit
Row 3: *K, K2tog, YO, K3tog, YO, SSK*; repeat
Row 4: Knit
Row 5: *K3tog, YO, K3tog, YO*; repeat
Row 6:  K2tog, K2; repeat.
Row 7: K2tog, K; repeat
Row 8: K2tog. Sew through remaining stitches and secure.

Friday, November 22, 2013

Best Pumpkin Bread

Since the Holidays are here I thought I would share another good recipe, this one is from a friend and makes a very moist and delicious bread which will be a big hit.  This does not have nuts or raisins in it but either are a great addition.

5 eggs
1 1/4 cups oil
1 14 ounce can of pumpkin
2 cups flour
2 cups sugar
2 (3 oz.) packages of vanilla cook and serve pudding
1 tsp soda
1 tsp cinnamon
1 tsp salt

Beat after every addition above until mixed thoroughly.  Do not over beat.
Grease 2 loaf pans (or use spray Pam)
Pour 1/2 into each loaf pan

Bake in a preheated oven at 325 degrees for 80 minutes or more.  The bread will look dark but do not remove from the oven until the top is NOT gooey and appears set.  Let it cool and enjoy!!   This bread freezes well if you want to save one loaf for later.

Tuesday, November 5, 2013

Simply Striped Ribbed Hat

Mom has clearly been beating me in the category of finishing projects - might have something to do with how crazy my October surprisingly became.

But... in the middle of the craziness I pulled this together for my husband's dental assistant. It is a toddler size (fitting perfectly on our spunky 3 year old).

Supplies:
I used scrap yarn - any two colors in worsted weight and about 1/3 skein for each color.

Size 7 Circular Needles
Pom-Pom Maker

Pattern:
Band: In main color cast on 80 stitches, place marker, and join. Work in Knit 2, Purl 2 Rib for 10 rows.
Stripe 1: Switch to alternating color and knit 4 rows in Purl 3, Knit 1 rib.
Stripe 2: Return to main color and knit 2 rows continuing in Purl 3, Knit 1 rib.

Alternate Stripe 1 and 2 until you have 9 Stripes (ending in a alternating color stripe 1).

Decrease:

Row 1: In main color, Purl 3, Knit 1, Purl 2, K2tog. Repeat 9 more times.
Row 2: In main color, Purl 3, Knit 1, Purl 1, K2tog. Repeat 9 more times.
Row 3 In alternating color, Purl 3, Knit 1, K2tog. Repeat 9 more times.
Row 4: In alternating color, Purl 3, K2tog. Repeat 9 more times.
Row 5: In alternating color, Purl 2, K2tog. Repeat 9 more times.
Row 6: In alternating color, Purl 1, K2tog. Repeat 9 more times.
Row 7: In alternating color K2tog 10 times. Break wool and use tail to sew stitches together and finish the hat.

Using the main color create a pom-pom (Ours is 1") to top the hat.

Sunday, November 3, 2013

Mountain Man Beard Hat

I have made a couple of beard hats, one a viking type hat, the other an elf, but wanted to do something a little more woodsy since we just got back from a mission trip to Alaska.  This one is of a little thicker yarn so it makes up pretty quick and will be a little warmer.  The beard is made in HDC then you go back over the base HDC posts on each stitch and make chain loops to give it a burly look.

For this I used Serenity Chunky Weight Yarn in Dark Forest for the hat
size K or 6.5mm hook

To start the hat make a magic loop or chain 4 and make a loop, then ch 1.

Round 1:  10 HDC in the loop, sl st to the top of the first st, ch 1. (10 HDC)
Round 2:  make 2 HDC in each st around, sl st to the top of the first st, ch 1.(20 HDC)
Round 3:  2 HDC in the first st, 1 HDC in the next, repeat around, sl st to the top of the first st, ch 1.  (30 HDC)
Round 4:  2 HDC in the first st, 1 HDC in the next 4 sts, repeat around, sl st to the top of the first st, ch 1.  (36 HDC)
Round 5:  2 HDC in the first st, 1 HDC in the next 5 sts, repeat around, sl st to the top of the first st, ch 1.  (42 HDC)
Round 6:  2 HDC in the first st, 1 HDC in the next 6 sts, repeat around, sl st to the top of the first st, ch 1.
(48 HDC)
Round 7:  2 HDC in the first st, 1 HDC in the next 7 sts, repeat around, sl st to the top of the first st, ch 1.
(56 HDC)
Rounds 8-16:  1 HDC in each st around, sl st to the top of the first st, ch 1.  (56 HDC)
Rounds 17-19: 1 SC in the first st, 1 DC in the post of the next st, repeat around, sl st to the top of the first st, ch 1.
at the end of row 19 tie off and weave in the end.

For the beard I used Lion Brand Vanna's Choice Yarn in Chocolate, and a size I hook.  You will need to know how to do HDCD (half double crochet decrease) stitches for this.  The beard will curve nicely around the chin to keep it nice and warm.
To start chain 31.
Row 1:  1 HDC in the second ch from the hook and then 1 HDC in each stitch across, ch 1 and turn. (30 HDC)
Row 2:   1 HDC in each st across, ch 1 and turn.  (30 HDC)
Row 3:  1 HDC in the first 9 sts, 2 HDC in the next st, 1 HDC in the next 9 sts, 2 HDC in the next st, 1 HDC in the last 10 sts, ch 1 turn.  (32 HDC)
Row 4:  1 HDC in each st across.  (32 HDC)
Row 5:  HDCD in the first 2 sts, 1 HDC in the next 8 sts, HDCD in the next two sts, 1 HDC in the next 8 sts, HDCD in the next 2 sts, 1 HDC in the next 8 sts, HDCD in the last two sts, ch 2 and turn. (28 HDC)
Row 6:  1 HDC in each st across.
Row 7:  HDCD in the first 2 sts, HDC in the next 7 sts, HDCD in the next 2 sts, HDC in the next 6 sts, HDCD in the next 2 sts, HDC in the next 7 sts, HDCD in the last 2 sts. ch 1

Now is the fun part, giving the beard some loops.  I used ch 6 loops, but if you want a longer beard you can chain 8 or more to get the length you like.  You will be working backwards back up the beard.  To start you sl st to the end HDC post of row 7 and then ch 6, sl st to the next post, repeat across for your first row of chain loops, then ch 1 and begin on the next row above.  After you have your 7 rows of chain loops you can add a mustache if you would like.  I folded the beard in half to make it even and counted down 8 stitches from each end, attach your yarn and chain 8 and sl st to the other side 8 stitches from the edge.  Chain 1 and sl st just above the ch into the main part of the beard and then sc across the chain, (8 SC) sl st just above the chain in the beard, then ch 4 and sl st to the next st, repeat this across the mustache making smaller chain loops, and when you get across to the other side turn and make 8 more ch loops across the bottom of the mustache.  Weave in your loose ends and attach the beard to the hat.

Friday, October 11, 2013

Make a Monster hat.


This hat is made with Vanna's Choice Yarns in the following colors:
Radiant Lime
Sapphire
White
Black

Toddler Size:
You will also need an I or 5.5 mm hook and a yarn needle.

To start make a magic loop or a chain 4 loop and ch 1.
Round 1:  10 HDC in the loop, sl st to the top of the first st and ch 1.
Round 2:  make 2 HDC in each st around. (20 HDC) sl st to the top of the first st and ch 1.
Round 3:  make 2 HDC in the first st, 1 HDC in the next st, repeat around (30 HDC) sl st to the top of the first st and ch 1.
Round 4:  make 2 HDC in the first st, 1 HDC in the next 4 sts, repeat around (36 HDC) sl st to the top of the first st and ch 1.
Round 5:  make 2 HDC in the first st, 1 HDC in the next 5 sts, repeat around (42 HDC) sl st to the top of the first st and ch 1.
Round 6:  make 2 HDC in the first st, 1 HDC in the next 6 sts, repeat around (48 HDC) sl st to the top of the first st and ch 1.
Round 7:  make 2 HDC in the first st, 1 HDC in the next 7 sts, repeat around (54 HDC) sl st to the top of the first st and ch 1.
Rounds 8-16:  1 HDC in each st around, (54 HDC) sl st to the top of the first st and ch 1.

Ear flaps:
Row 1:  1 HDC in the next 12 sts, ch 1 and turn.
Row 2:  sk the first st, 1 HDC in the next 9 sts, HDCD in the last 2 sts, ch 1 turn.
Row 3:  sk the first st, 1 HDC in the next 7 sts, HDCD in the last 2 sts, ch 1 turn.
Row 4:  sk the first st, 1 HDC in the next 5 sts, HDCD in the last 2 sts, ch 1 turn.
Row 5:  sk the first st, 1 HDC in the next 3 sts, HDCD in the last 2 sts, ch 1 turn.
Row 6:  sk the first st, 1 HDC in the next st, HDC in the last 2 sts, ch 1.
Row 7:  HDCD in the two remaining sts, tie off.

Count 20 sts across the front of the hat, attach your yarn on the 21st st and ch 1, to begin the second ear flap, repeat the instructions above.

to finish the bottom of the hat starting at the tip of the ear flap with Sapphire SC evenly around the bottom of the hat.  Weave in all ends.

Monster eye:
with black make a magic loop, and ch 2.
round 1:  make 10 SC in the loop and pull the loop tight, sl st to the top of the first st tie off.
round 2:  switch to Sapphire ch 1, and do 2 HDC in each stitch sl st to the top of the first st, tie off and switch to white.
round 3:  ch 2, do 2 DC in the first st, 1 DC in the next st, repeat around, sl st to the top of the first st, tie off leaving a long tail to sew on the eye around the bottom.
Now switch to Radiant lime and start just above the tail from round 3.
Row 1:  ch 1, then do 1 SC in the next 16 sts, turn and work back sk the first st, then do 1 HDC in the next 14 sts, sl st in the last st and tie off leaving a long tail to sew on the top half of the eye.

Horns: Make 2 in Radiant Lime.
make a magic loop and ch 1,
do 6 HDC in the loop and pull it tight, sl st to the top of the first st and ch 1.
Round 2:  2 HDC in each stitch around, sl st to the top of the first st, and ch 1.
Round 3:  2 HDC in the first st, 1 HDC in the next st, repeat around, sl st to the top of the first st, tie off leaving a tail to sew on the horn.

Mouth:  Using a yarn needle with double thread embroider on a mouth using a backstitch.

Braids are each made with twelve strands, 4 of each color and strands are 30 inches long.

Preschool size:
To start make a magic loop or a chain 4 loop and ch 1.
Round 1:  10 HDC in the loop, sl st to the top of the first st and ch 1.
Round 2:  make 2 HDC in each st around. (20 HDC) sl st to the top of the first st and ch 1.
Round 3:  make 2 HDC in the first st, 1 HDC in the next st, repeat around (30 HDC) sl st to the top of the first st and ch 1.
Round 4:  make 2 HDC in the first st, 1 HDC in the next 4 sts, repeat around (36 HDC) sl st to the top of the first st and ch 1.
Round 5:  make 2 HDC in the first st, 1 HDC in the next 5 sts, repeat around (42 HDC) sl st to the top of the first st and ch 1.
Round 6:  make 2 HDC in the first st, 1 HDC in the next 6 sts, repeat around (48 HDC) sl st to the top of the first st and ch 1.
Round 7:  make 2 HDC in the first st, 1 HDC in the next 7 sts, repeat around (54 HDC) sl st to the top of the first st and ch 1.
Round 8:  make 2 HDC in the first st, 1 HDC in the next 8 sts, repeat around (60 HDC) sl st to the top of the first st and ch 1.
Rounds 9-18:  1 HDC in each st around, sl st to the top of the first st and ch 1.  At the end of row 18 begin first ear flap following the above instructions.  Start the second ear flap by counting 24 sts across the front of the hat then attach the yarn and ch 1 follow the instructions above for the second ear flap.

Finishing the bottom of the hat:
Starting at the tip of the ear flap SC evenly around the bottom of the hat using Sapphire Blue, sl st to the top of the first st and make braids using the instructions above.  I do a couple of SC's on the tips of the ear flaps so they lay flat.

Use the pattern above for eyes and horns.


Monday, September 30, 2013

Bushy stitch Dish Cloth

New stitch Monday!!  I have been practicing new stitches again and really like this one because it is such a nice texture and the bonus is that it makes a pretty scalloped edge!!  For this I used Lily Sugar and Cream Ombre in Country Sage but you can make it any color you like.   The bushy stitch is a combination of single and Double crochet stitches that form an asymmetrical shell.  (2 DC, ch 2, 1 SC)

I used a size I hook
yarn needle to weave in the end.

To start you will need to chain 31. (multiples of 3 then add one to make something bigger or smaller).


Row 1:  sk 3 ch, (1 DC, ch 2, 1 SC) in the next ch,  *sk 2 ch, (2 DC, ch 2, 1 SC) in the next ch*, repeat from *, ch 2 and turn.
Row 2:  *(2 DC, ch 2, 1 SC) in each ch 2 space* from the previous row across, ch 2.  Repeat row 2 until your cloth is square, approximately 18 rows.

You can leave the bottom straight or go across it to finish the edge by joining in the bottom right hand corner of the foundation chain and work across in the bottom of each shell, sk the first 2 ch
 *(2 DC, ch2, 1 SC), sk 2 ch* across and tie off at the end.


Friday, September 27, 2013

Hungry Caterpillar Baby Hat

Size 6 to 12 months.
For this hat I used Lion Brand, Vanna's Choice Yarn
in the following colors:
Scarlet
Kelly Green
Radiant Yellow 
Espresso
I also used a size H or 5mm Hook and a yarn needle to sew on the parts. 

The base of the hat is worked in Double Crochet (DC) and the bottom is worked in a front post stitch where you alternate with one Single Crochet in the first stitch then one DC in the post of the stitch above your next stitch.  This gives it a little nicer finish at the bottom.  

Working in Scarlet:
You can either start with a magic loop, or chain 4 and make a loop, then chain 2.
Round 1:  make 10 DC in the loop, sl st to the top of the first st, and ch 2.
Round 2:  do 2 DC in each st around, sl st to the top of the first st, ch 2. (20 DC)
Round 3:  *2 DC in the first st, 1 DC in the next st*, repeat around, sl st to the top of the first st, ch 2. (30 DC)
Round 4:  *2 DC in the first st, 1 DC in the next 2 sts*, repeat around, sl st to the top of the first st, ch 2.  (40 DC)
Round 5:  *2 DC in the first st, 1 DC in the next 3 sts*, repeat around, sl st to the top of the first st, ch 2. (50 DC)
Round 6:  1 DC in each st around, sl st to the top of the first st, ch 2. (50 DC)
Round 7:  *2 DC in the first st, 1 DC in the next 9 sts*, repeat around, sl st to the top of the first st, ch 2. (55 DC)
Rounds 8-12:  1 DC in each st around, sl st to the top of the first st, ch 2.  After round 12 ch 1.  
Rounds 13-14:  *1 SC in the first st, do a DC post st in the stitch above the next st*, repeat around, and sl st to the top of the first SC, ch 1.  (28 post stitches).

Eyes:  working in Kelly Green, make a loop, ch 2.
Round 1:  do 3 DC, 2 TC, 3 DC, 3 TC in the loop, sl st to the top of the first DC, tie off and switch to yellow, ch 1.
Round 2:  2 HDC in each st around, tie off leaving enough yarn to sew the eye on.  

Antennae:  Working in Espresso make a loop and ch 2. (Make 2)
Round 1:  6 DC, sl st to the top of the first st, ch 1.
Round 2 & 3:  1 HDC in each st around, sl st to the top of the first st, ch 1.
Round 4:  1 HDCD in the first two sts, 1 HDC in the next 4 sts, sl st to the top of the first st., ch 1.
Rounds 5-7:  1 HDC in each st around, sl st to the top of the first st, ch 1.  At the end of round 7 tie off leaving enough yarn to sew on. 

Nose:  Working in Kelly Green make a loop and ch 1.
Round 1:  do 6 HDC, 4 SC in the loop, sl st to the top of the first st and tie off leaving enough tail to sew on the nose.

Monday, September 23, 2013

Patriotic Starburst Dishcloth

This is another new stitch for me, actually I tried to make a dishcloth from a book I purchased and could not get it to work, so I had my sister try it, then my niece tried as well and we all failed.  After looking at the Reader's Digest Complete Guide to Needlework we got it figured out.  Turns out the pattern in the book was missing a couple of key steps to finish the starburst.  After a trial I decided it also needed a base chain that is first chain stitches, then one row of single crochet to keep the bottom neat.  This pattern also requires DC decrease stitches worked in multiple stitches and I will try to give a good description of that so it makes it easier.  In this dish cloth I used the following:
Size I or 5.5 mm hook
yarn needle
Lily Sugar 'n Cream cotton yarn in Cornflower, Red and White.

The starburst stitch is worked in multiples of 8 plus 2 in the base chain, so for a dishcloth I used 34 for my base chain starting with the Cornflower chain 34.
Row 1:  ch 1 then do 1 SC in each stitch in your chain, turn.
Row 2:  ch 1, sk the first st, SC in the next st, *sk 3 sts, 9 DC in the next st, sk 3 sts, 1 SC in the next st*, repeat across, ending with a SC in the last st.  Tie off and change to White turn.
Row 3:  ch 3 sk the first SC, 4 DCD in the next 4 sts. (*yo, insert hook in next st, pull up a loop, yo pull through first two loops*,  repeat in the next three sts, yo pull through all 5 loops on the hook, ch 4), SC in the next st, ch 3 start next starburst by doing [9 DCD in the next 9 sts.  *yo, insert hook in next st, pull up a loop, yo pull through two loops on the hook* repeat in the next 8 sts, yo pull through all 10 loops on the hook, ch 4, sc in the next st, ch 3], start the next starburst.  After making the third starburst end the row with 5 DCD in the last 5 sts, (yo, insert hook in next st, pull up a loop, yo pull through the first two loops* repeat in next 4 sts, yo pull through all 6 loops on the hook, ch 3 turn.
Row 4:  4 DC in the top of the starburst, 1 SC in the SC, *9 DC in the center of the next starburst, 1 SC in the next SC* repeat in the next 2 starbursts, 5 DC in the top of the last starburst, tie off, switch to red ch 3 turn.
Row 5:  sk the first st, *9 DCD in the next 9 sts, ch 4, sc in the next st, ch 3*, repeat across and end with a SC in the turning ch, ch 1, turn.
Row 6:  SC in the SC *9 DC in the top of the starburst, 1 SC in the next SC* repeat across ending with 1 SC in the turning ch, tie off and switch to white, ch 3.
Row 7 to Row 17:  repeat intructions from Row 3-6 changing colors every two rows.
Row 18:  SC evenly across the top securing the ch 3 stitches to the DC below in the starbursts to elimanate gaps.  Tie off and weave in all ends.

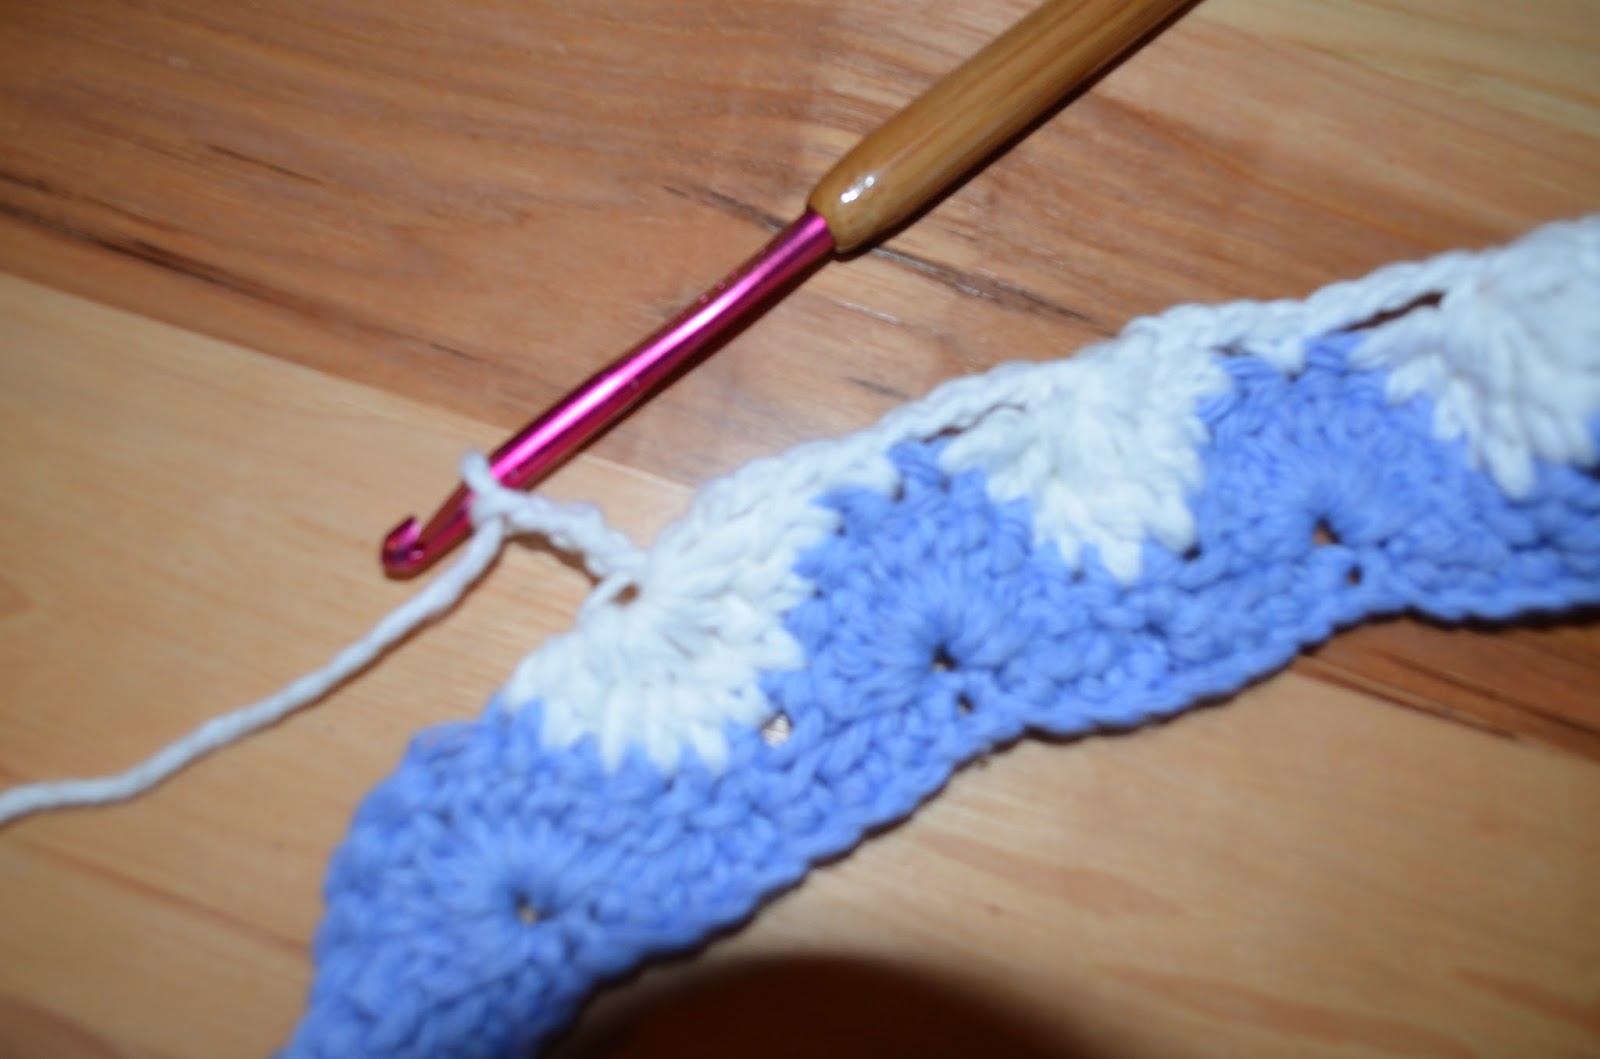
Making the Starburst stitch.